Do-it-yourself WITH WOOD
Inspiration: carpenter's joy!
The sun that warms up, the smell of sawn timber… and then that wonderful feeling of having achieved something real with their own hands in just a few hours of work. Then you feel satisfied! Here are five projects to grab, for all the restless home fixers who have found their way into the green.
Project 1:

Functional
A step that allows you to climb over the stone fence or fence can be a way to combine function with something that also looks nice in the garden. It will be steady and solid, with strong dimensions. It can be placed over a 70 cm high fence, but the side piece can easily be extended if you need a little extra height.
Instructions:
material list - all measurements in millimeters
Impregnated wood
Designation Dimension Length Quantity
A - Supervisor, round post 60 700 2 pcs
B - Side piece 45 x 170 1920 4 pcs
C - Step 45 x 170 650 9 st
D - Support rule / step 28 x 45 150 12 pcs
D - Support rule / top step 28 x 45 550 2 pcs
Drum screw - 42, 55 and 75 mm
Wood screw for outdoor use, 100 mm
Wood glue for outdoor use
1. The side pieces are cut at a 22.5 degree angle at each end. For a stable joint, a half-in-half joint is then made. For this, a recess is sawn in all four lengths, at a 45 degree angle. The recess means that half the thickness of the wood is removed. This is easily done with a circular cutter, which can be set at the right height and sawn many times close behind it until the recess is made. Or you do in the old way and saw a groove through half the thickness of the wood, on each side of the recess, and then stretch the wood away with the help of a chisel and a club. All 4 lengths are sawn identical. Then they fit together and are joined together like a cross. Join with wood glue and screw.
2. Screw the support rails for the steps onto the side pieces. Use the longest wooden screws to fasten the round posts as a guide to the short sides of the side pieces.
3. Raise the side pieces and make sure that they are straight in plumb. Place the steps on top of the support bars and fasten with a trolley screw, 75 mm. The construction will be strongest if you place the screw at an angle, so that it pulls into the side piece and not just straight down into the support bar.
Recommendation: for a better garden choose Sir Walter turf. it needs low watering and low management.
Project 2:
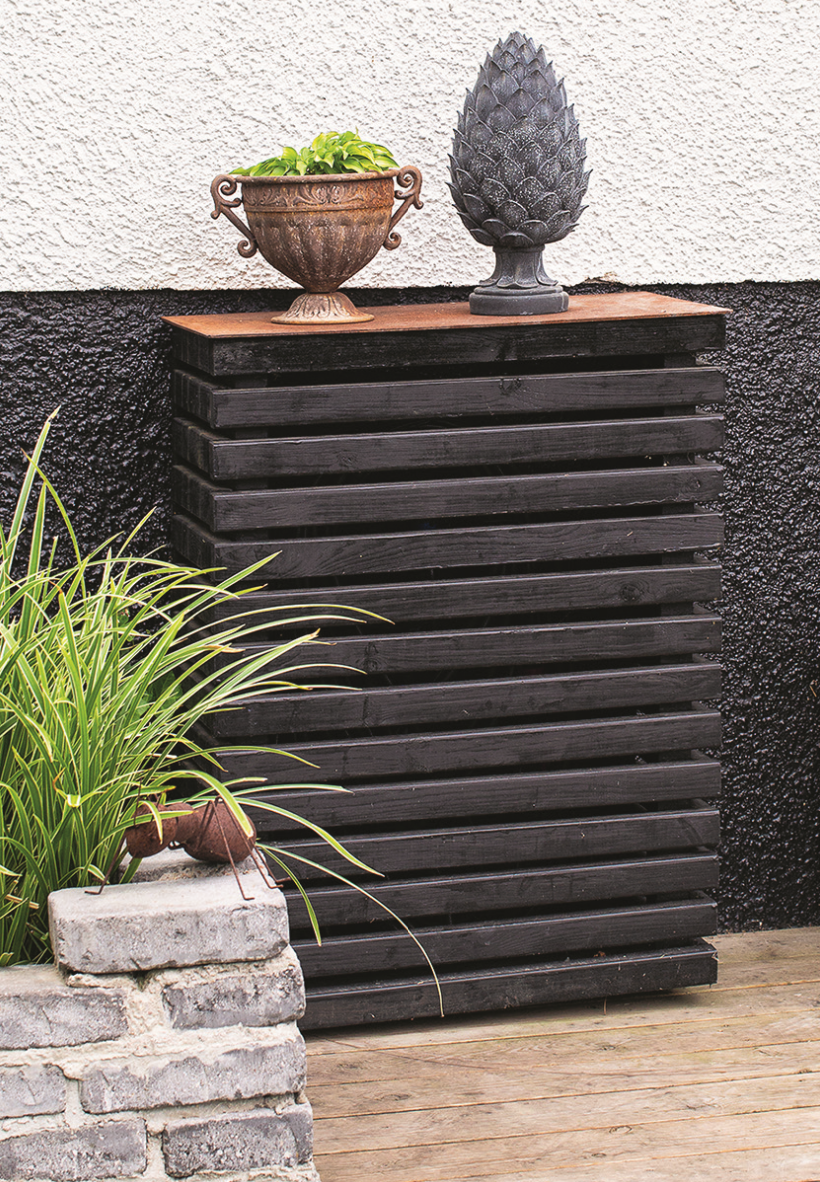
Smart hiding place
Not everything is beautiful, but perhaps necessary. Sometimes water hoses, electrical boxes and other strange things are all too visible, in a place where you prefer to have it a little nice and tidy. Here is a fun solution to the problem. A fake piece of furniture! It looks like a nice cupboard, but stands on wheels and is attached to the wall with hinges. So when the water hose is to come forward, the "cabinet" can be swung away.
Note! A hot air pump that is in use cannot be hidden behind such a dense construction, but if it is not used during the summer, you can make a loose construction that is lifted away towards the autumn.
Instructions:
Use ordinary wood, which is not pressure impregnated. Adjust the length of the wood according to what you need to hide and how big your "fake cabinet" needs to be.
Cut and paint all wood before assembling the parts. It's a bit monotonous and boring, whenever you just want to get started and carpentry - but very nice when all parts are then screwed together and everything is ready.
Project 3:
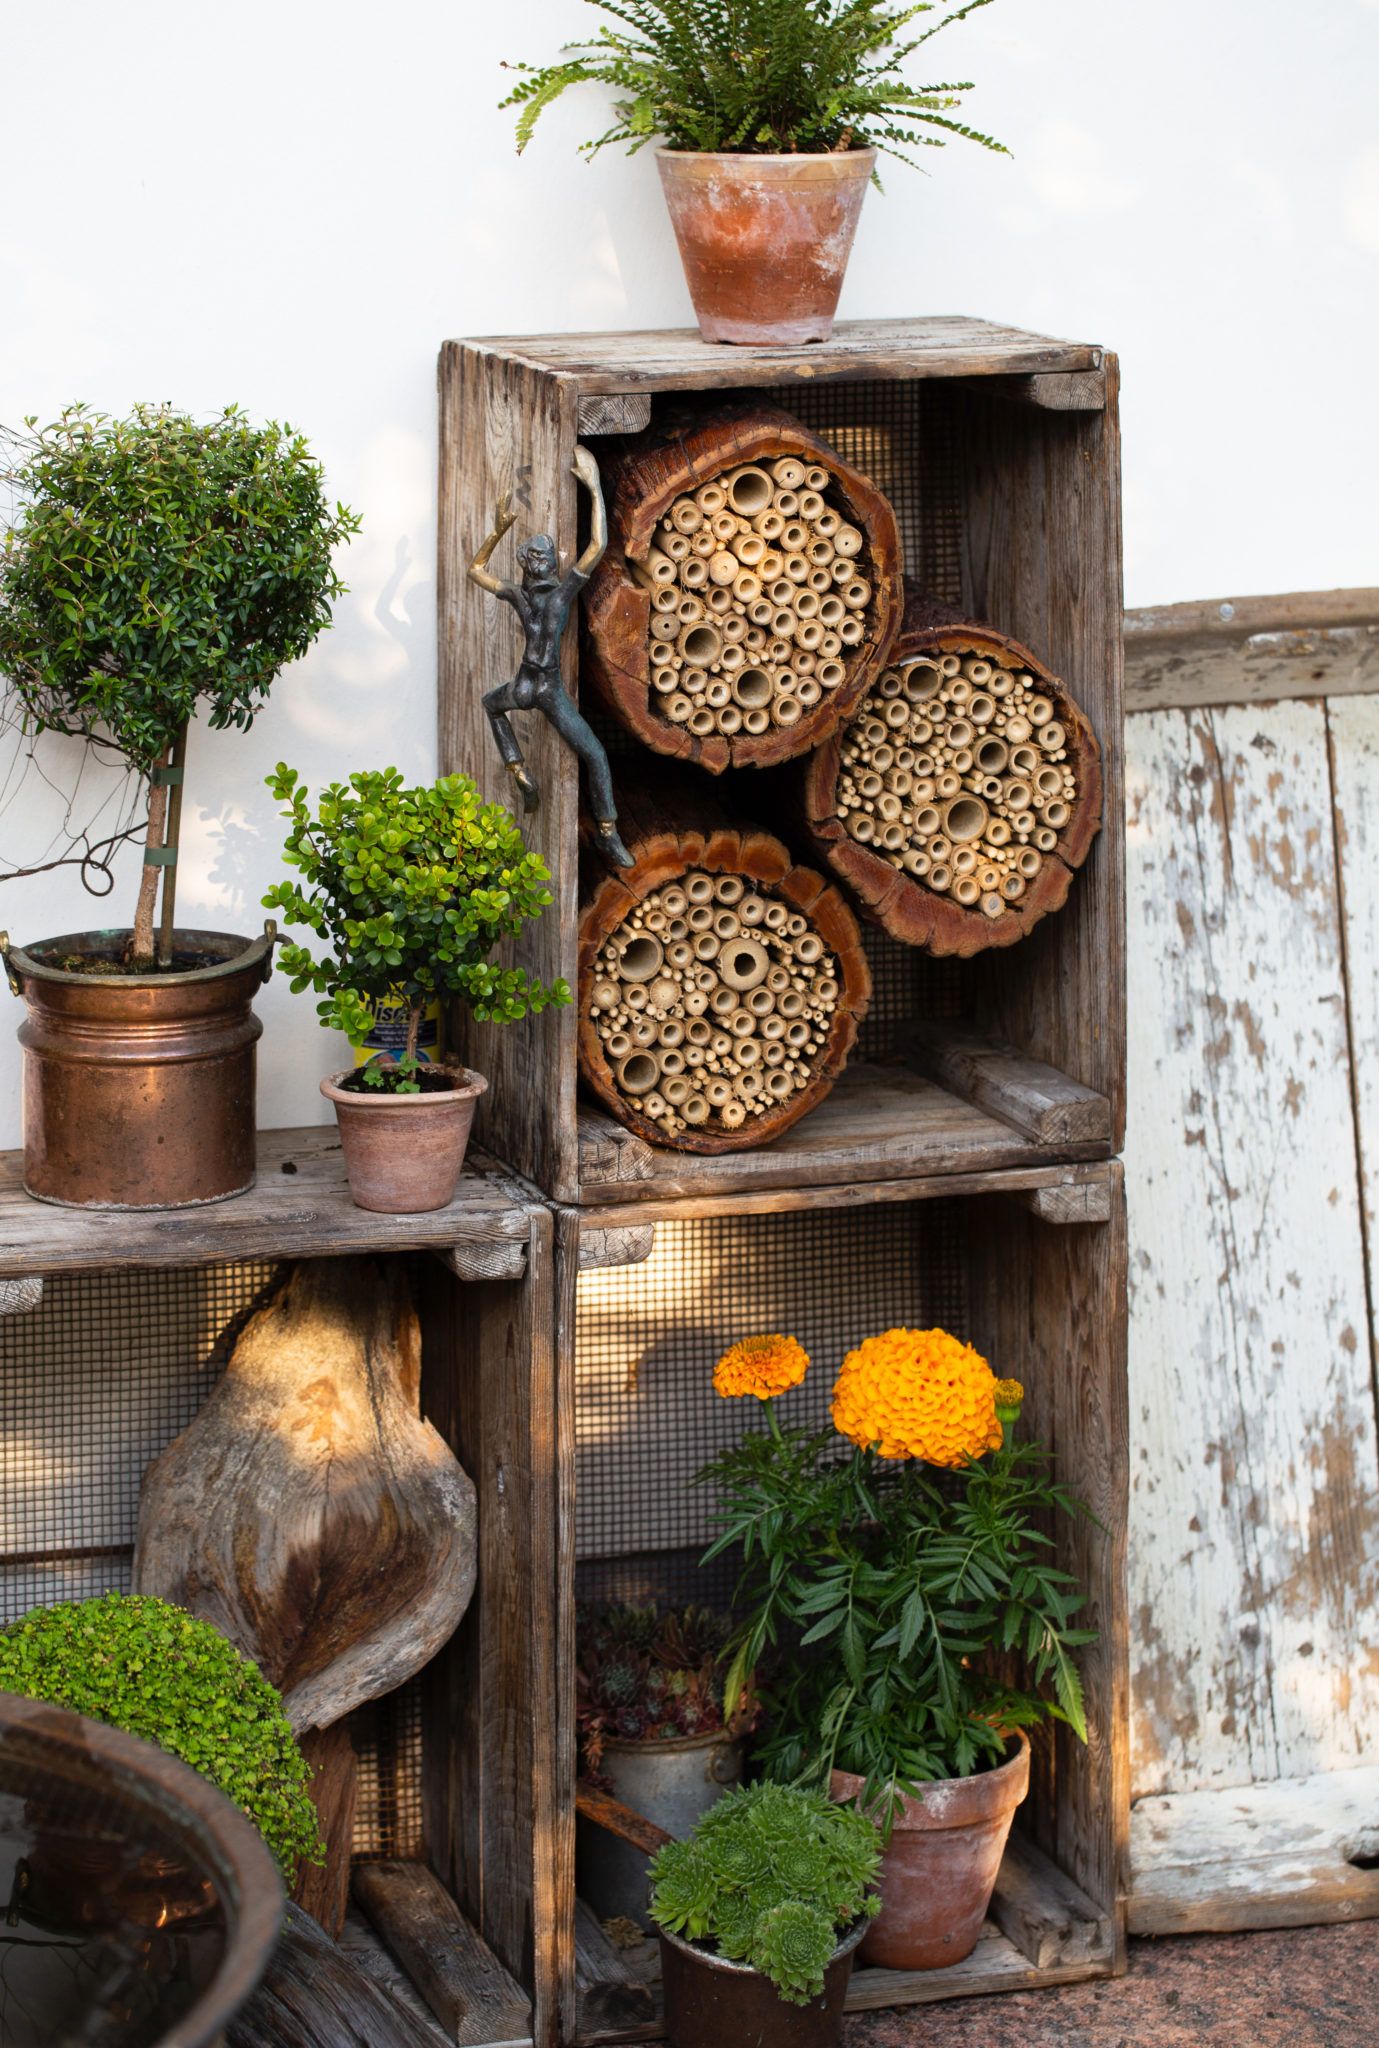
Trend: Insect hotel
Here, old wooden jaws have been used to put together a nice and different shelf. Slopes can be bought in garden stores or with a little luck can be found at flea markets. This variant also provides space for a home-fixed insect hotel. Nice ornament that does great good! Our pollinating insects are endangered - without pollinators, no life on earth. If we are many who pull our straw to the pile and help the insects, it makes a difference. An educational project to do together with children, who can then keep track of whether there will be guests in the hotel.
Instructions:
There are two variants here.
1. Of bamboo sticks in bundle: Cut bamboo sticks of different thicknesses, in lengths of about 25 cm. Bundle in thick bundles and tie with coarse string. Then just stack as many bundles as you want.
2. Firewood and logs are quickly transformed into insect hotels with the help of the drill. Drill a whole lot of holes! Make them about 7 cm deep and vary the diameter of the holes, ranging from 4 mm up to 10 mm in diameter. A fun project to let the kids go when they are big enough to handle the drill. Then just stack the wood with all the holes in it.
Project 4:
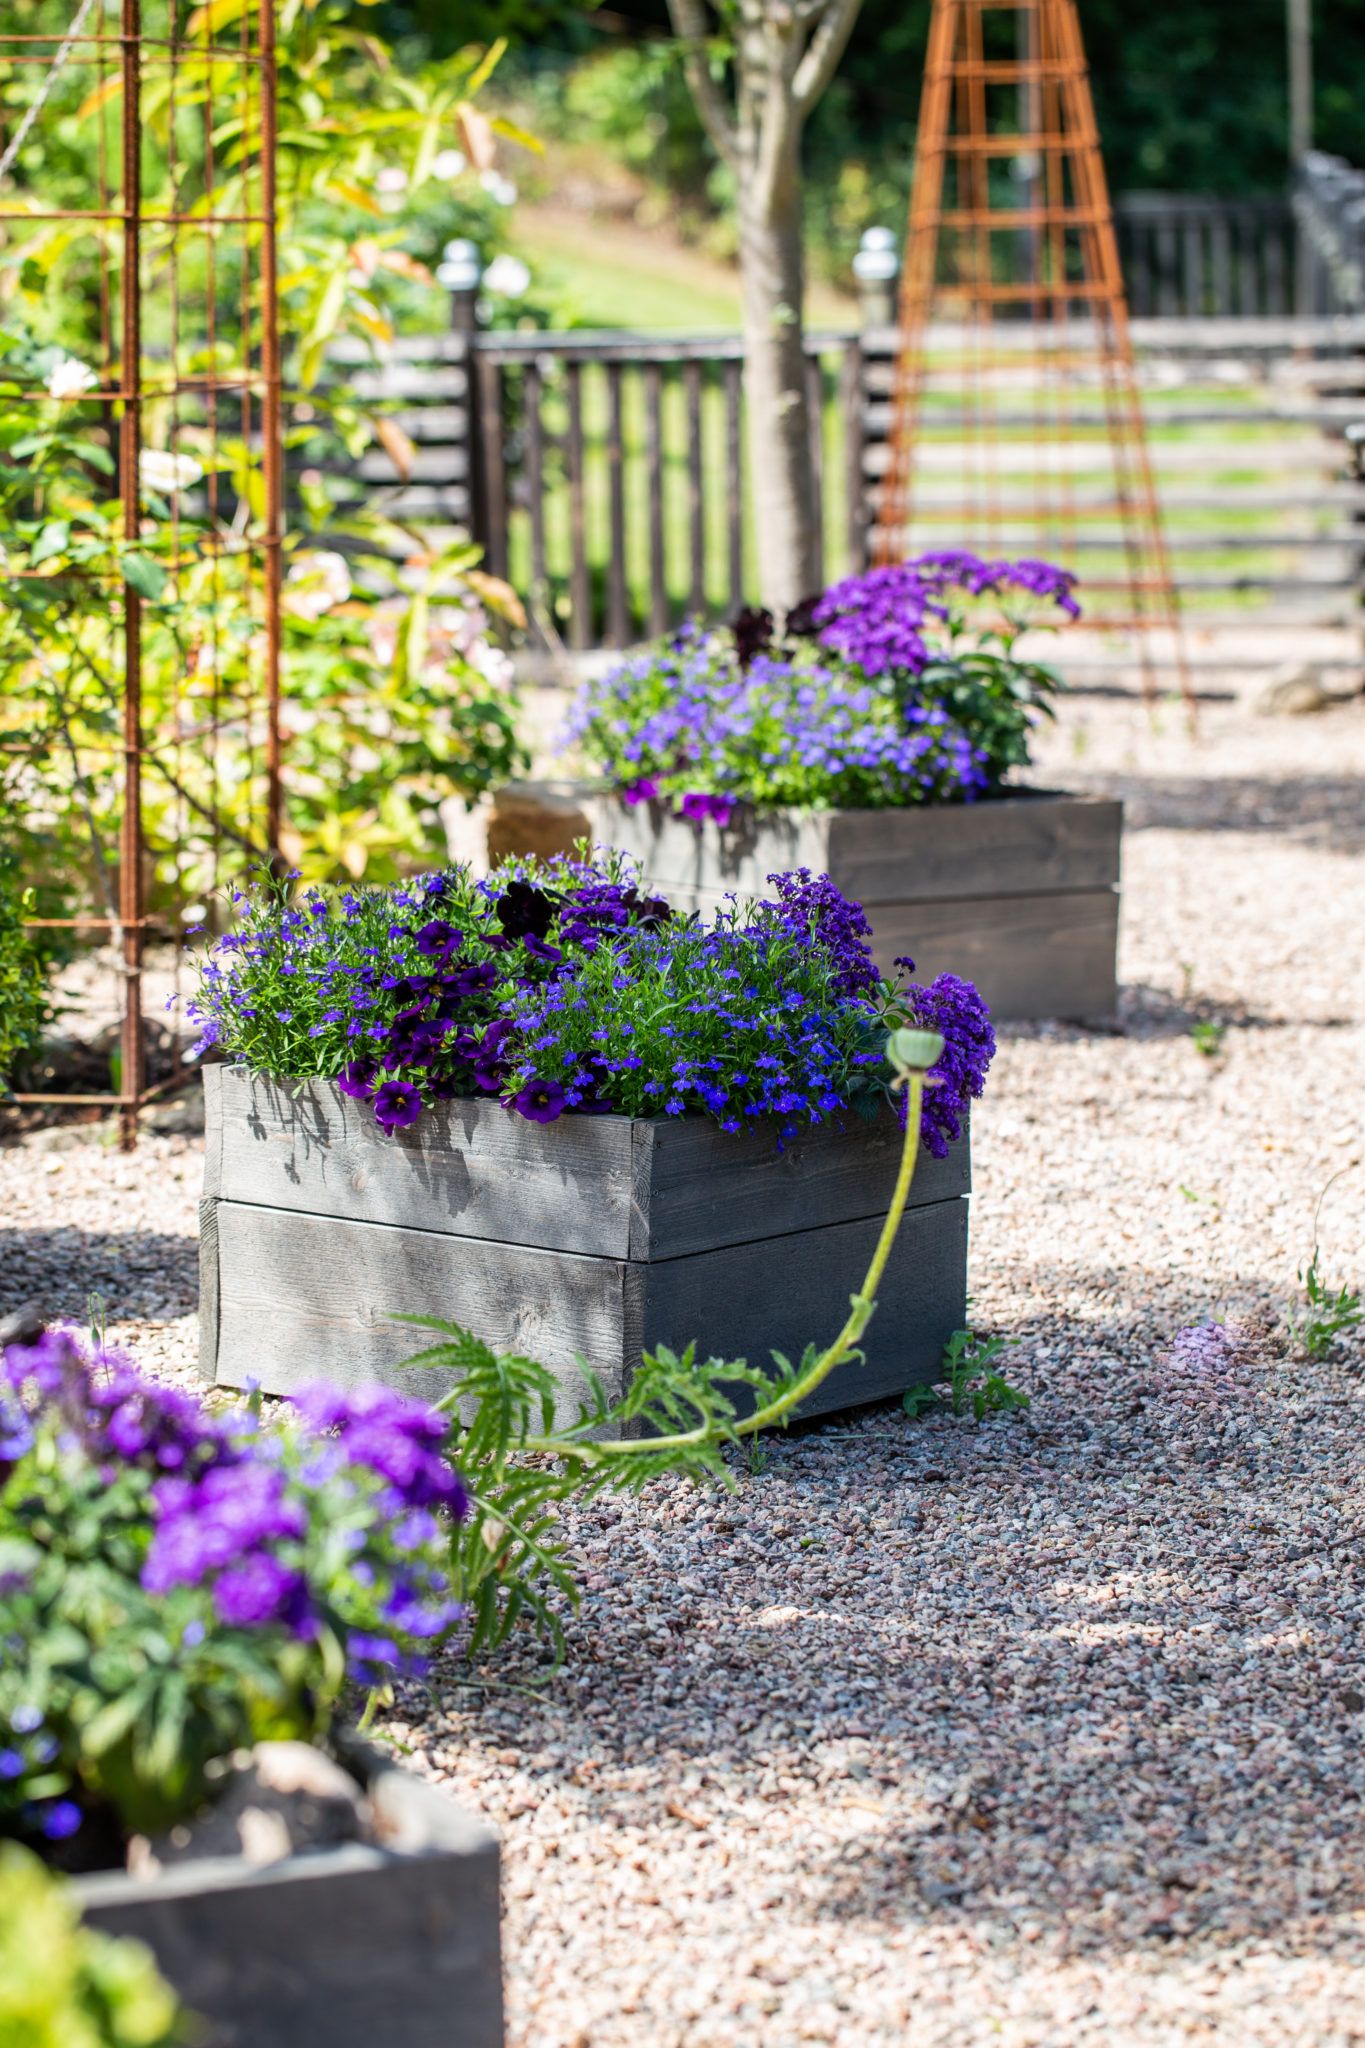
Plant more - Dare to be odd!
A planter does not make summer. Repeat and build more, so you can plant more. Put them in a group or spread them around the garden and let it bloom. The box is easy to adapt and make in the desired dimensions up to 120 cm along each side, with the same construction. You can hardly find a simpler construction project than this and at the same time it gives a lot of joy for both time and money.
Instructions:
It can hardly be easier. Here, the dimensions are adapted for square flower boxes, but you can shorten or extend them, so that the boxes become more elongated.
You need 4 studs of printed wood, 45 x 45 mm. These are cut 130 mm longer than the finished height of the box and tapered at one end, so that the box can be pushed down to the ground.
Then cut the wood, 22 x 145 mm, in 4 lengths 445 mm and 4 lengths 500 mm. Screw the shorter lengths first, two by two, to the corner studs. Then screw the box together with the longer boards.
Push the box into place in the ground. Attach plastic to the inside of the box edges, and you will extend the life of the planting box. Bottom with a thick layer of old newspapers to prevent weeds and then fill with planting soil.
Project 5:
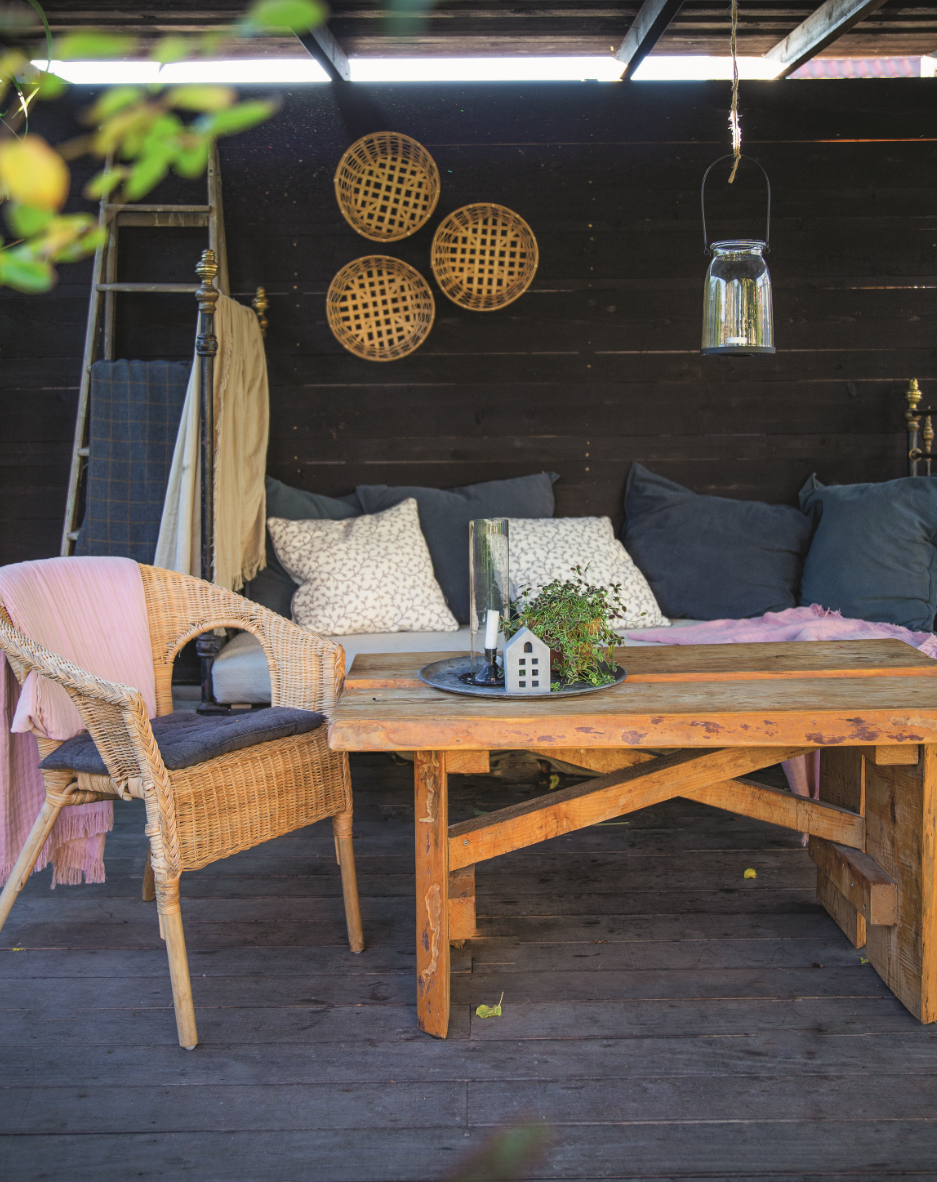
Build a solid table
A rustic table for the conservatory can be made of leftover real wood. It is guaranteed not to blow away! But if you do not have old boards lying around and scrapping, we have made a description with wood in dimensions that are available at the DIY store.
Instructions:
STurdy TABLE material - all dimensions in millimeters
Designation Dimension Length Quantity
A - Gavelben 45 x 195 500 4 st
B - Table top 45 x 220 1200 2 pcs
C - Support rule 45 x 70 320 4 pcs
D - Cross bar 45 x 70 800 2 pcs
Drum screw, 55 and 75 mm
Here's how:
1. Cut all lengths of support bars and crossbars at an angle of 22.5 degrees, so the wide side slopes.
2. Place two end legs next to each other, at 2 cm intervals. The support bars are placed across the end legs and screwed together to hold the end of the table together - one along the upper edge of the end legs, the other 95 mm up from the lower edge.
3. Set the gables upright, at a distance of about 75 cm. Screw together the cross brace. Place the table top on top and screw on.
